How to paginate and sort for join queries in Spring Boot
Let’s say you have two entities which has many-to-one relationship and you want to paginate your query on the parent side with additional colums …

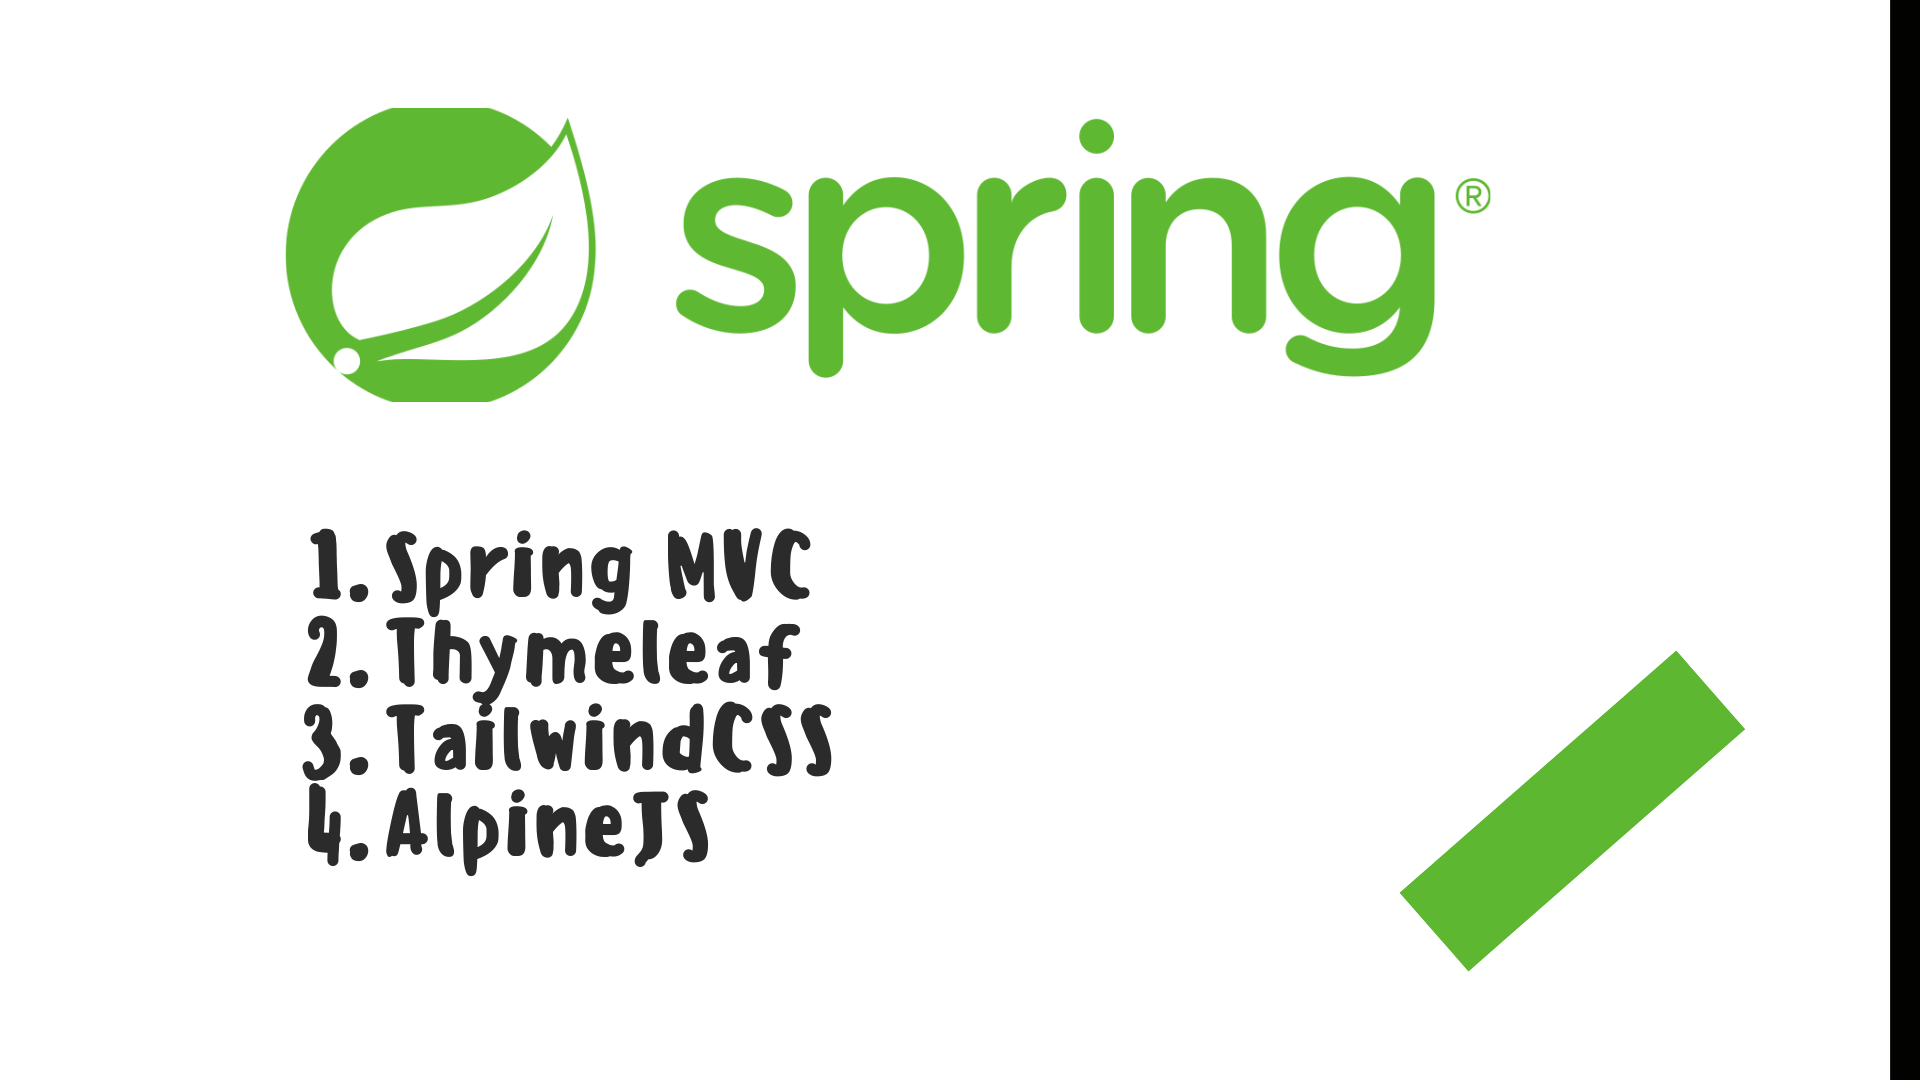
In this tutorial, we will integrate Spring MVC with gulp and webpack.
As you know creating Spring MVC project with Thymelaef project is so easy. But adding tailwind, npm packages or any related JS stuff is not easy.
Note: In the previous https://mehmetozanguven.com/gulpjs-for-backend-developers/, I explained what the Gulp is.
Here is the list of technologies we will use:
If you only need to see the code, here is the github link
Let’s walk through each step one by one.
Please install the Node and NPM, because we will create project with npm commands
Via https://start.spring.io/, please create the new spring boot project with the following dependencies:
Please create the following files:
@Controller
public class IndexController {

    @GetMapping("/")
    public String getIndex() {
        return "index";
    }
}
$primary-color: #57f357;

#dummy {
  color: $primary-color;
}
<!DOCTYPE html>
<html lang="en" xmlns:th="http://www.thymeleaf.org">
  <head>
    <meta charset="UTF-8" />
    <title>Title</title>
    <link rel="stylesheet" th:href="@{/css/index.css}" />
  </head>
  <body>
    <div id="dummy">Test</div>
    <script th:src="@{/js/index.js}"></script>
  </body>
</html>
export const utilFunction = () => {
  console.log("Util function called");
};
import { utilFunction } from "./util/util";

utilFunction();
If you skip this step, you will probably be lost in the configuration !!
We have to disable thymeleaf cache in the local environment. Otherwise your changes won’t be reflected to the browser. Update the application-local.properties :
spring.thymeleaf.cache=false
spring.web.resources.chain.cache=false
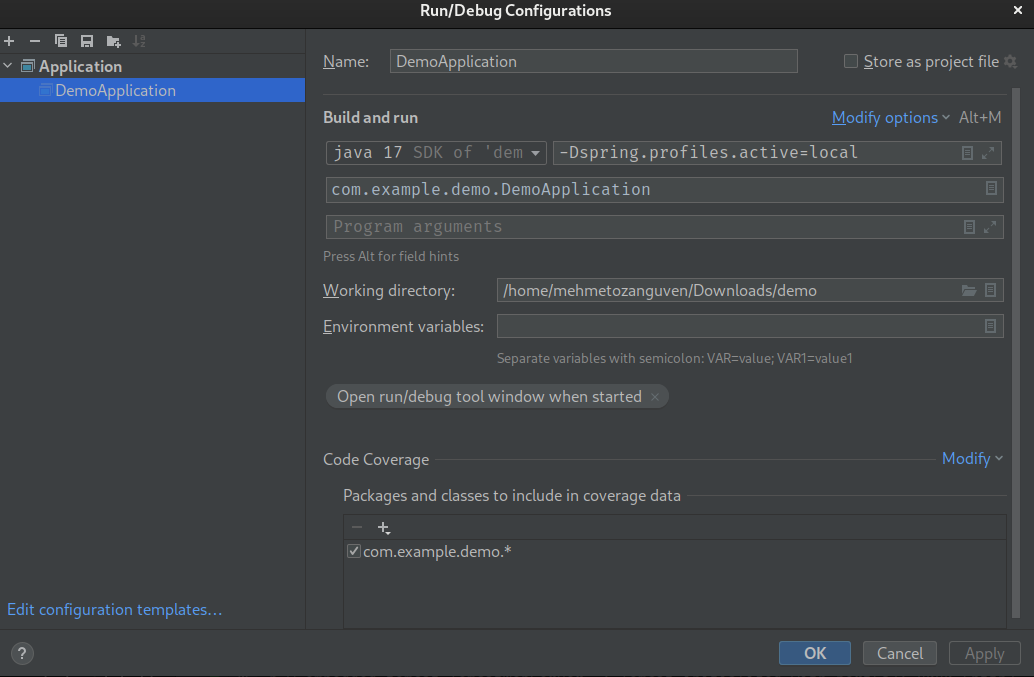
Note: When you run project from IDEA (such as IntelliJ), your environment will be default. I can’t say how to change your environment in Eclipse or other IDEAs. However I can show the configuration for IntelliJ:
Because gulp & webpack will build the appropriate HTML, JS & CSS files, we have to tell Maven do not build these files. We can do that by updating our pom.xml file:
<?xml version="1.0" encoding="UTF-8"?>
<project ...>
	<modelVersion>4.0.0</modelVersion>
	<parent>
		<groupId>org.springframework.boot</groupId>
		<artifactId>spring-boot-starter-parent</artifactId>
		<version>3.0.0</version>
		<relativePath/> <!-- lookup parent from repository -->
	</parent>
	...
	<description>Demo project for Spring Boot</description>
	<properties>
		<java.version>17</java.version>
	</properties>
	<dependencies>
		...
	</dependencies>

	<build>
		<resources>
			<resource>
				<directory>src/main/resources</directory>
				<excludes>
					<exclude>**/*.html</exclude>
					<exclude>**/*.css</exclude>
					<exclude>**/*.scss</exclude>
					<exclude>**/*.js</exclude>
				</excludes>
			</resource>
		</resources>
		<plugins>
			<plugin>
				<groupId>org.springframework.boot</groupId>
				<artifactId>spring-boot-maven-plugin</artifactId>
				<configuration>
					<excludes>
						<exclude>
							<groupId>org.projectlombok</groupId>
							<artifactId>lombok</artifactId>
						</exclude>
					</excludes>
				</configuration>
			</plugin>
		</plugins>
	</build>
</project>
With this configuration, if you run mvn clean install -DskipTests, then target directory will not contain any html, js or css files
Do not forget the reload your maven configuration !!
This plugin https://github.com/eirslett/frontend-maven-plugin will allow us to download Node and NPM locally for our project and we can be able run the npm command while building our application with maven
Update the pom.xml (with the appropriate nodejs and npm version):
Do not change
gulp buildcommand, because we are going to define this command in ourpackage.jsonfile
<?xml version="1.0" encoding="UTF-8"?>
<project ...>
	...
	<properties>
		<java.version>17</java.version>
		<frontend.maven.plugin.version>1.12.1</frontend.maven.plugin.version>
		<node.version>v16.16.0</node.version>
		<npm.version>8.11.0</npm.version>
	</properties>
	<dependencies>
		...
	</dependencies>

	<build>

		<plugins>
			<plugin>
				<groupId>org.springframework.boot</groupId>
				<artifactId>spring-boot-maven-plugin</artifactId>
				...
			</plugin>

			<plugin>
				<groupId>com.github.eirslett</groupId>
				<artifactId>frontend-maven-plugin</artifactId>
				<version>${frontend.maven.plugin.version}</version>

				<executions>
					<execution>
						<id>install node and npm</id>
						<goals>
							<goal>install-node-and-npm</goal>
						</goals>
						<configuration>
							<nodeVersion>${node.version}</nodeVersion>
							<npmVersion>${npm.version}</npmVersion>
						</configuration>
					</execution>
					<execution>
						<id>npm install</id>
						<goals>
							<goal>npm</goal>
						</goals>
						<configuration>
							<arguments>install</arguments>
						</configuration>
					</execution>
					<execution>
						<id>run-gulp-build</id>
						<goals>
							<goal>gulp</goal>
						</goals>
						<configuration>
							<arguments>build</arguments>
						</configuration>
					</execution>
				</executions>
			</plugin>
		</plugins>
	</build>
</project>
When we are ready to release our application, we should create a new jar with the production flag: mvn clean install -Prelease -DskipTests
Please update pom.xml:
Do not change
gulp build --env productioncommand !!
<?xml version="1.0" encoding="UTF-8"?>
<project ...>
	<properties>
        ...
	</properties>
	<dependencies>
		...
	</dependencies>

	<build>
		<resources>
            ...
		</resources>
		<plugins>
			<plugin>
				<groupId>org.springframework.boot</groupId>
				<artifactId>spring-boot-maven-plugin</artifactId>
				....
			</plugin>

			<plugin>
				<groupId>com.github.eirslett</groupId>
				<artifactId>frontend-maven-plugin</artifactId>
				<version>${frontend.maven.plugin.version}</version>
                ...
			</plugin>
		</plugins>
	</build>
	<profiles>
		<profile>
			<id>release</id>
			<build>
				<resources>
					<resource>
						<directory>src/main/resources</directory>
						<excludes>
							<exclude>**/*.html</exclude>
							<exclude>**/*.css</exclude>
							<exclude>**/*.scss</exclude>
							<exclude>**/*.js</exclude>
						</excludes>
					</resource>
				</resources>
				<plugins>
					<plugin>
						<groupId>com.github.eirslett</groupId>
						<artifactId>frontend-maven-plugin</artifactId>
						<executions>
							<execution>
								<id>run-gulp-build</id>
								<goals>
									<goal>gulp</goal>
								</goals>
								<configuration>
									<arguments>build --env production</arguments>
								</configuration>
							</execution>
						</executions>
					</plugin>
				</plugins>
				<finalName>your_final_jar_name</finalName>
			</build>
		</profile>
	</profiles>
</project>
Make sure that you have reloaded your maven project. Otherwise your pom.xml setup may not work.
Before create new project make sure that you have installed gulp-cli globally.
In the Spring Boot Project folder, run the following command: npm init
After that you should see new file called package.json:
{
  "name": "demo",
  "version": "1.0.0",
  "description": "",
  "main": "index.js",
  "scripts": {
    "test": "echo \"Error: no test specified\" && exit 1"
  },
  "author": "",
  "license": "ISC"
}
Make sure that these files are placed in the same directory with package.json
At the end, you should have these files:
I am not going to explain reason for each dependencies. You can search on the Internet:
npm install --save-dev webpack webpack-stream webpack-cli babel-loader @babel/core @babel/cli @babel/preset-env vinyl-named autoprefixer gulp gulp-postcss gulp-sass node-sass gulp-environments gulp-html-minifier-terser browser-sync
Add the following content:
module.exports = {
  plugins: {
    autoprefixer: {},
  },
};
Now we have to define tasks in the gulpfile.js
const gulp = require("gulp");
const named = require("vinyl-named");
const webpack = require("webpack-stream");
const environments = require("gulp-environments");
const postcss = require("gulp-postcss");
const sass = require("gulp-sass")(require("node-sass"));
const browserSync = require("browser-sync");
const htmlmin = require("gulp-html-minifier-terser");
// ...
const htmlmin = require("gulp-html-minifier-terser");

browserSync.create();
// ...
const environments = require("gulp-environments");
// ...
browserSync.create();

const development = environments.development;
const production = environments.production;
target/classes, let’s define a variable for that:// ...
const production = environments.production;
// Our gulp's task will update the folder targetClassesDestination
const targetClassesDestination = "target/classes/";
Copy the html files from the source (which is placed src/main/resource) and apply some operations (such as minify) then put the result to the folder:
// ...
const targetClassesDestination = "target/classes/";

/// HTML tasks
const htmlSource = ["src/main/resources/**/*.html"];
function copyHtmlTask(done) {
  gulp
    .src(htmlSource)
    .pipe(htmlmin({ collapseWhitespace: true }))
    .pipe(gulp.dest(targetClassesDestination));
  done();
}
// ...

const targetClassesDestination = "target/classes/";

// ...

/// CSS & scss tasks
const scssSources = [
  "src/main/resources/**/*.css",
  "src/main/resources/**/*.scss",
];
function copyScssTask(done) {
  gulp
    .src(scssSources)
    .pipe(postcss())
    .pipe(sass())
    .pipe(gulp.dest(targetClassesDestination));
  done();
}
This will be different than others. We have to specify more exact location for the .src() and .dest() stream(Because of the customized setup). Otherwise gulp would place output files to the different location.
// ...

const targetClassesDestination = "target/classes/";

// ...

/// JS tasks
const jsSources = ["src/main/resources/static/js/**/*.js"];

const jsOutput = "target/classes/static/js";
function copyJsModern(done) {
  gulp
    .src(jsSources)
    .pipe(named())
    .pipe(
      webpack({
        devtool: development() ? "inline-source-map" : false,
        mode: development() ? "development" : "production",
        module: {
          rules: [
            {
              test: /\.js$/,
              exclude: /node_modules/,
              loader: "babel-loader",
              options: { presets: ["@babel/preset-env"] },
            },
          ],
        },
      })
    )
    .pipe(gulp.dest(jsOutput));
  done();
}
Now the rest is just to find an answer to a question “how to run these internal task”
We will define this task as default.
// ...

/// JS tasks
const jsSources = ["src/main/resources/static/js/**/*.js"];

// ...

function watching_files() {
  browserSync.init({
    proxy: "localhost:8080", // default location for spring boot
    injectChanges: false,
    files: [
      "target/classes/templates",
      "target/classes/static/js",
      "target/classes/static/css",
    ],
  });
  gulp.watch(htmlSource, gulp.series(copyHtmlTask, copyScssTask));
  gulp.watch(scssSources, gulp.series(copyScssTask));
  gulp.watch(jsSources, gulp.series(copyJsModern));
}
gulp.task("watch", watching_files);
gulp.task("default", gulp.series("watch"));
gulp.watch(htmlSource, gulp.series(copyHtmlTask, copyScssTask)); => listen the files inside the htmlSource, if anything changes then run the copyHtmlTask & copyScssTask tasks respectively
gulp.watch(scssSources, gulp.series(copyScssTask)); => listen the files inside scssSources, if anything changes then run copyScssTasktask
gulp.watch(jsSources, gulp.series(copyJsModern)); => listen the files inside jsSources, if anything changes then run copyJsModerntask
gulp.task("watch", watching_files); => sets watching_files function as watch command
gulp.task("default", gulp.series("watch")); => if anyone runs the gulp command, by default watch command will be run.
Create build task for gulp
After defining the watch task, we also have to define our build task flow:
// ...
gulp.task("build", gulp.series(copyHtmlTask, copyScssTask, copyJsModern));
Nothing but just run the all tasks by one by.
Update the script field in the package.json:
{
  "name": "demo",
  "version": "1.0.0",
  "description": "",
  "main": "index.js",
  "scripts": {
    "test": "echo \"Error: no test specified\" && exit 1",
    "build": "gulp build",
    "watch": "NODE_ENV=development gulp watch",
    "build-prod": "NODE_ENV='production' gulp build"
  },
  "author": "",
  "license": "ISC"
  // ...
}
At this stage, you can be able to run your spring application without any error. Here are the steps to run application:
npm run build && npm run watchAfter that your browser will open the http://localhost:3002.
To check everything works as expected => while application is running, change anything in the index.html, index.scss or index.js file. You should see the changes immediately.
To build the application, just stop npm command and run: mvn clean install -Prelease -DskipTests and run the jar file: java -jar target/jar_name.jar
If you have prod environment:
java -jar -Dspring.profiles.active=prod target/jar_name.jar
Let’s add tailwind and alpineJs
For more information about tailwindcss => https://tailwindcss.com/docs/installation
npm install -D tailwindcss
npx tailwindcss init
module.exports = {
  content: ["./src/main/resources/templates/**/*.html"],
  theme: {
    extend: {},
  },
  plugins: [],
};
style.tailwind.css file inside the resources/static/css@tailwind base;
@tailwind components;
@tailwind utilities;
module.exports = {
  plugins: {
    tailwindcss: {}, // add tailwindcss
    autoprefixer: {},
  },
};
<!DOCTYPE html>
<html lang="en" xmlns:th="http://www.thymeleaf.org">
  <head>
    ...
    <link rel="stylesheet" th:href="@{/css/style.tailwind.css}" />
  </head>
  <body>
    <div class="text-4xl" id="dummy">Test</div>
    <script th:src="@{/js/test.js}"></script>
  </body>
</html>
Re-run the project.
Install the npm package: npm install alpinejs
Update the index.html:
<!DOCTYPE html>
<html lang="en" xmlns:th="http://www.thymeleaf.org">
  <head>
    ...
    <style>
      [x-cloak] {
        display: none;
      }
    </style>
  </head>
  <body>
    <div x-data="dummyAlpineComponent" class="text-4xl" id="dummy">Test</div>
    ...
    <script th:src="@{/js/dummyComponent.js}"></script>
  </body>
</html>
import Alpine from "alpinejs";

Alpine.data("dummyAlpineComponent", () => ({
  init() {
    console.log("Alpine works !! ");
  },
}));

window.Alpine = Alpine;

Alpine.start();
Re-run the project and open the home page, you can see the log statement “Alpine works !!”
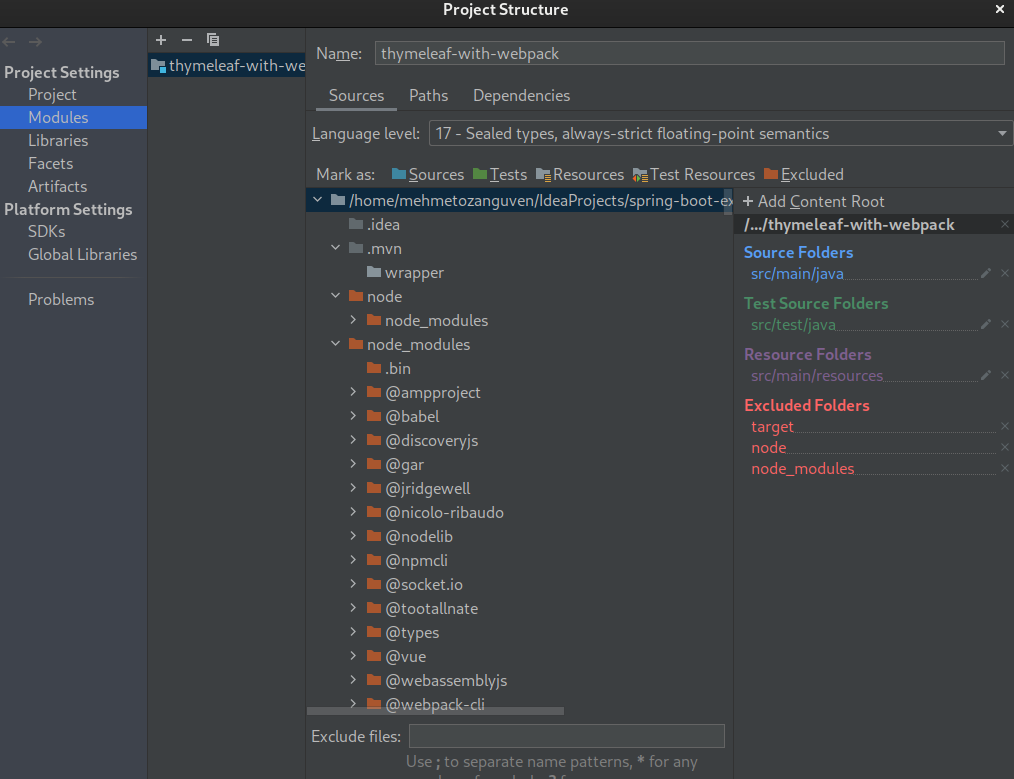
As a final note, because you now have node_modules & node directories, IntelliJ will try to create an index anything inside node_modules & node directories(to be able search you queries quickly). If you want to disable this:
You may say that “too much steps to just configure and run the project.” You are definitely right. And this is also time consuming. I hope in the future release of Spring Boot, Spring’s team provides easy and elegant way.
But until then, you have to do it yourself !!!
Let’s say you have two entities which has many-to-one relationship and you want to paginate your query on the parent side with additional colums …
Almost every blog(s) on the Internet for caching operation in the Spring Boot are using @Cacheable, @CacheEvit, @CachePut vs… In this blog we …